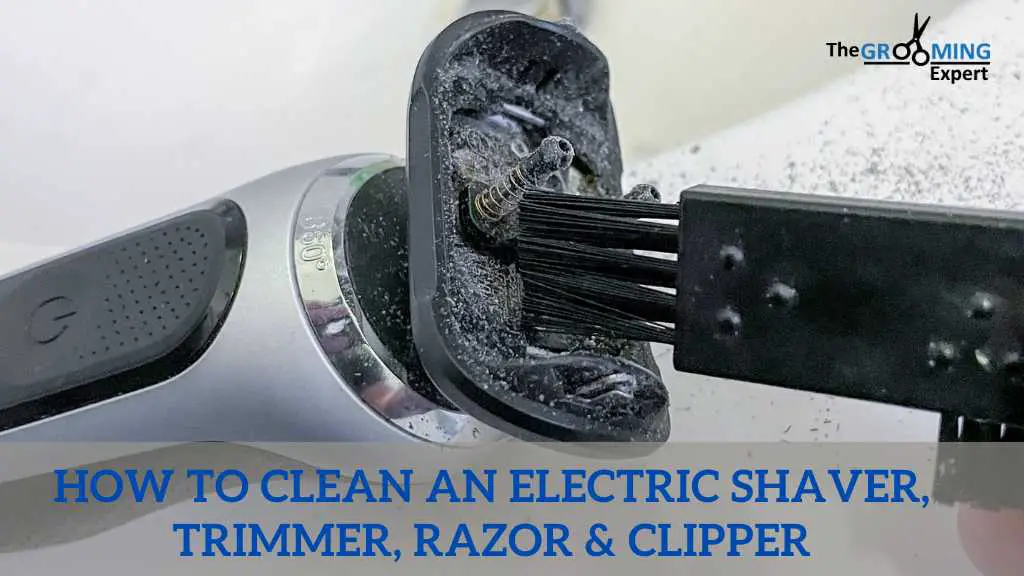
How To Clean An Electric Shaver, Trimmer, Razor & Clipper. Your electric shaver is a trusty companion in your grooming routine, but to keep it performing at its best, it needs a little TLC. Cleaning your electric shaver properly not only ensures a smooth shave but also maintains hygiene.
Maintaining cleanliness and hygiene in your grooming tools is essential for a comfortable and effective shaving experience. Whether you use an electric shaver, trimmer, razor, or clipper, regular cleaning is key to prolonging their lifespan and ensuring optimal performance.
In this comprehensive guide, we’ll walk you through the step-by-step process of cleaning and maintaining your electric shaver, trimmer, razor, and clipper. Empowering you to achieve a clean and hygienic grooming routine effortlessly. From disassembly to sanitization and reassembly, we’ll cover everything you need to know to keep your grooming tools in top-notch condition for a smooth and comfortable shave every time.
Understanding Electric Shavers or Grooming Tool
Electric shavers are handy gadgets designed to make shaving hassle-free. They come with different parts like blades, foils, and a motor, all working together to give you a close shave. Knowing how these parts function will help you clean them effectively.
What You Need: To clean your electric shaver, Trimmer, and Clipper
- Cleaning brush
- Mild soap or detergent
- Warm water
- Lubricating oil or spray
How Long Will This Take to Clean?
Cleaning your electric shaver, Trimmer, Razor, and Clipper typically takes about 5-10 minutes, depending on how thorough you want to be. It’s a small investment of time that pays off in improved performance and hygiene.
How to Clean Electric Razors, Trimmers, and Clippers
Electric razors, trimmers, and clippers may have different designs, but the cleaning process is quite similar. Follow these steps for a thorough clean:
Disassemble (if Possible)
If your device allows it, carefully disassemble the parts according to the manual. Disassembling your electric shaver, if possible, is an essential step in ensuring a thorough cleaning process. Many electric shavers are designed to allow for easy disassembly, enabling access to the individual components for more effective cleaning. By carefully taking apart the device according to the manufacturer’s instructions, you can reach areas that are otherwise inaccessible during surface cleaning.
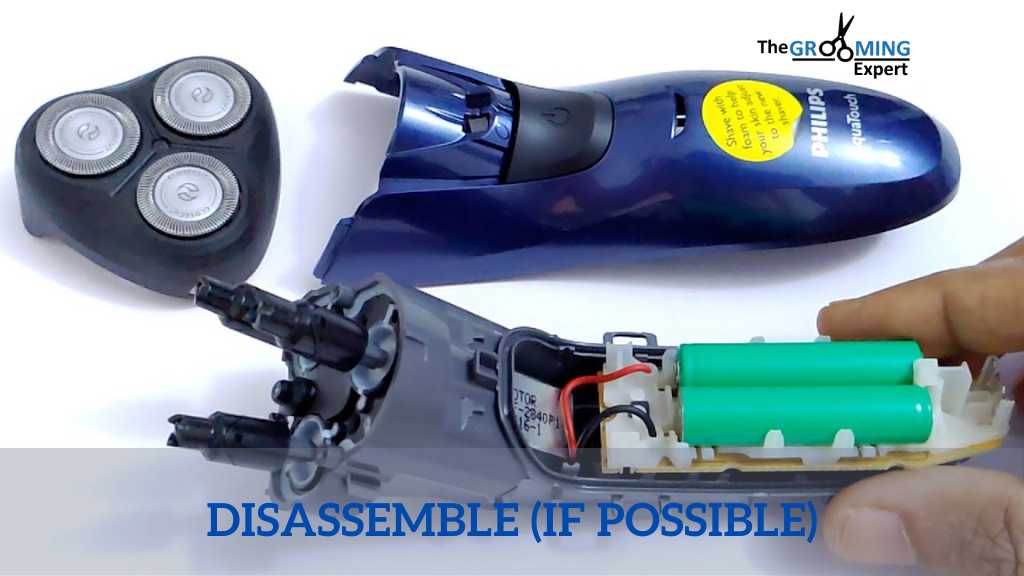
This allows you to remove hair, debris, and buildup from intricate parts such as the blades, foils, and shaving heads. Disassembling also facilitates a deeper cleaning process, ensuring that no residue is left behind, which could otherwise compromise the performance and hygiene of your electric shaver.
However, it’s crucial to handle the disassembly process with care to avoid damaging any delicate components and to ensure that you can safely reassemble the shaver afterward.
Remove Hair and Debris
Use a cleaning brush to gently brush away hair and debris from the blades and other components. Removing hair and debris from your electric shaver is a crucial step in the cleaning process to maintain optimal performance and hygiene.
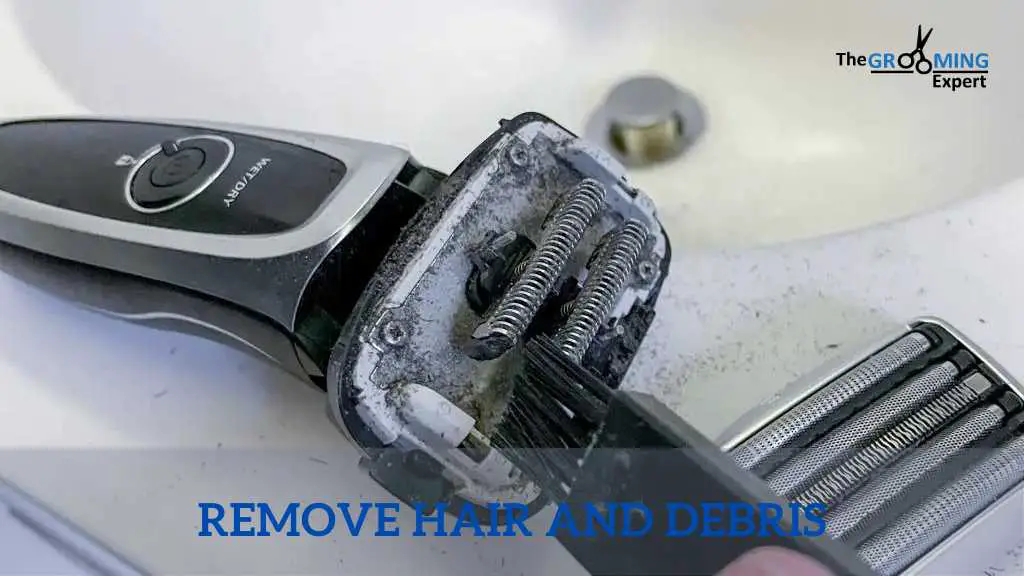
Over time, hair, dead skin cells, and other debris can accumulate in the shaving head, blades, and foils, leading to decreased efficiency and potential skin irritation. Using a cleaning brush, gently sweep away any visible hair and debris from the surface of the shaver.
Pay close attention to the areas around the blades and foils, as these are the areas most prone to buildup. By thoroughly removing hair and debris, you ensure that your electric shaver operates smoothly and effectively, providing you with a clean and comfortable shave every time.
Clean the Shaving Head and Blades
Rinse the detached parts under warm water to flush out stubborn debris. Cleaning the shaving head and blades of your electric shaver is a crucial step to ensure its optimal performance and hygiene. After removing visible hair and debris, it’s essential to give these components a thorough clean to remove any remaining residue.
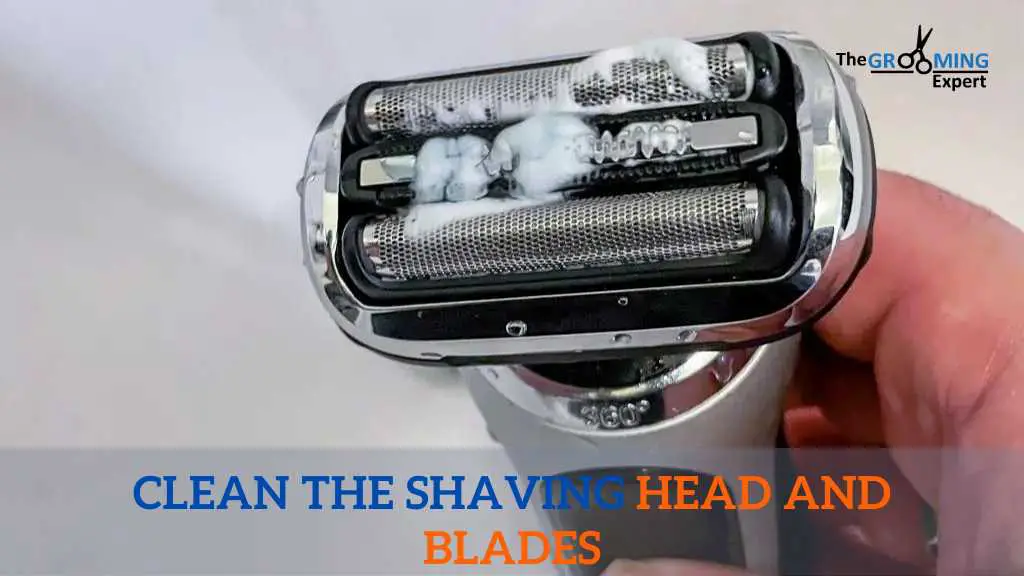
Start by rinsing the shaving head and blades under warm running water to flush out stubborn debris and buildup. You can use your fingers to gently agitate the blades and foils to dislodge any trapped particles. If necessary, you can also soak the components in a solution of mild soap and water for a deeper clean. Be sure to rinse them thoroughly afterward to remove any soap residue.
Once clean, allow the shaving head and blades to air dry completely before reassembling the shaver. Cleaning the shaving head and blades regularly not only ensures a smooth and comfortable shave but also helps prevent the buildup of bacteria and other contaminants, promoting better overall hygiene.
Wash If Possible
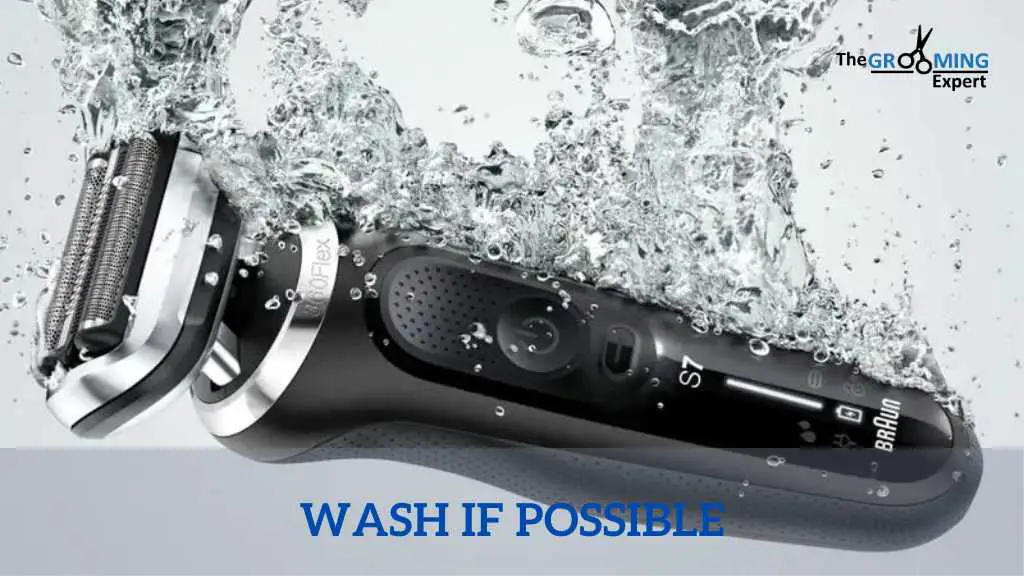
If your electric shaver is water-resistant, washing it under running water is an effective way to remove dirt and debris. Just be sure to check the manufacturer’s instructions to ensure it’s safe for your device.
Sanitize and Dry
Soak the parts in soapy water for a few minutes for a deeper clean. Rinse thoroughly and let them air dry completely. After cleaning the shaving head and blades of your electric shaver, the next step is to sanitize and dry the components thoroughly. Sanitizing helps eliminate any remaining bacteria or germs, ensuring optimal hygiene for your next shave.
You can sanitize the components by using a sanitizing solution specifically designed for electric shavers, or you can simply rinse them again with clean water. Additionally, make sure to dry the components completely before reassembling the shaver. Allow the shaving head and blades to air dry naturally, or gently pat them dry with a clean, lint-free cloth.
Avoid using heat sources such as hair dryers, as excessive heat can damage the delicate components of the shaver. Once the components are completely dry, you can proceed to reassemble the shaver and store it in a clean, dry place until your next use.
Regular sanitization and thorough drying are essential steps in maintaining the cleanliness and performance of your electric shaver, ensuring a hygienic and comfortable shaving experience every time.
Reassemble Carefully
Once dry, reassemble the parts, ensuring everything fits snugly. After sanitizing and drying the components of your electric shaver, the final step is to reassemble it carefully. Reassembling the shaver ensures that all parts are properly aligned and secured, allowing for optimal performance during your next shave.
Begin by carefully placing the blades and foils back into the shaving head, making sure they fit snugly and are oriented correctly. Take care to align any tabs or grooves that help secure the components in place. Once the shaving head is reassembled, carefully attach it to the main body of the shaver, ensuring that all connections are secure and tight.
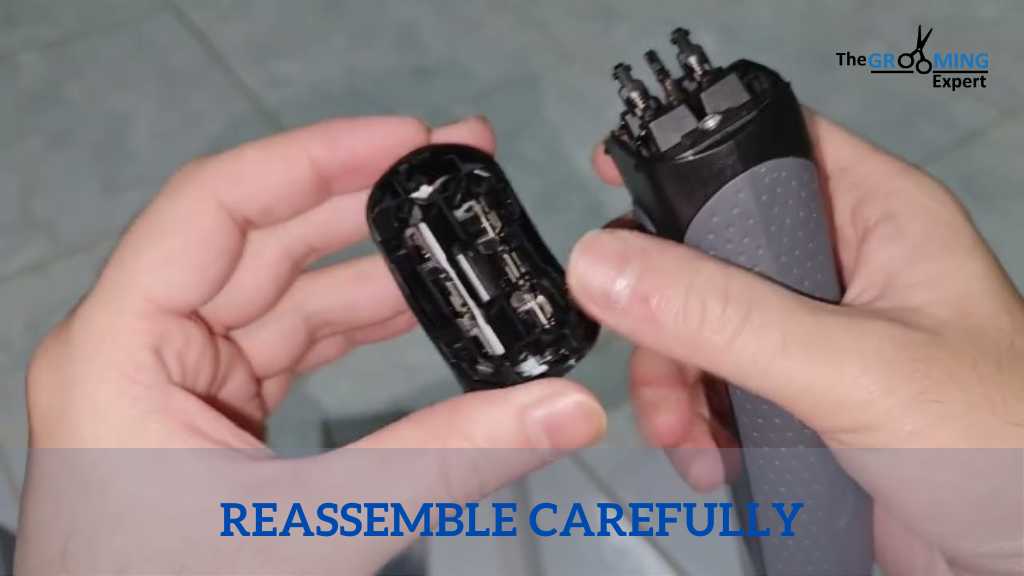
If your shaver has any additional attachments or accessories, such as trimmers or combs, reattach them as well. Finally, double-check that all components are properly assembled and that there are no loose or misaligned parts.
Reassembling your electric shaver with care ensures that it operates smoothly and efficiently, providing you with a comfortable and effective shaving experience.
Conclusion
With these simple steps, you can keep your electric shaver clean and perform its best for years to come. Regular maintenance not only ensures a smooth shave but also promotes good hygiene. So, give your shaver some love, and it’ll repay you with a close, comfortable shave every time.
If you need a detailed article on how to clean an electric razor, we have everything you need to know.If you need a detailed article on how to clean an electric razor, we have everything you need to know.

Meet Irwin Jolly, the grooming expert passionate about men’s grooming products. Irwin has been in the industry for years, and he’s tried and tested hundreds of grooming products to help men achieve their desired looks. Regarding grooming, skincare, and hair styling, Irwin knows what works and what doesn’t. His reviews are honest and thorough, and he doesn’t promote anything he hasn’t tried and tested. He believes grooming is essential to self-care, and he’s dedicated to helping men look and feel their best.
